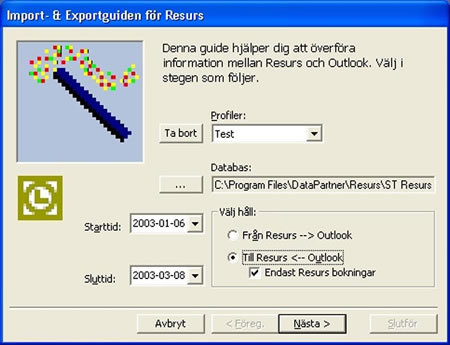
| In the first step of Resource
Outlook Guide (see figure below) you select start time,
and end time and what direction the transfer should go. The guide
will point to the database normally used in Resource. If you want
to work with another database, you click on the button with (...)
and select another database.
Here you also select start- and end time.
They decide in what time frame the guide shall look for bookings,
both in Resource and
in Outlook. If select wrong start- and end time the guide will give
you a message that no bookings are valid in the select interval.
You also select what direction the information
shall go by selecting either "To Resource from Outlook"
or "From Resource to Outlook". If you select the first
choice you can also select that Resource
Outlook Guide only shall show records originating from
Resource by selecting "Only Resource bookings".
There are four buttons at the bottom of the guide.
With these you navigate between the different steps. The first button,
"Cancel" will finish the guide and is available during
all steps of the guide. The button "Previous" will take
you to the previous step in the guide. If you are on the first step
this button is disabled. In the same manor the button "Next"
will take you to the next step in the guide. With the button "Apply"
the transfer will start between Resource
and Outlook or vice versa. The button "Apply" is only
available at the last step in the guide.
If you click on the button 'Next'
you will be taken to the next step and 'Cancel'
button will shutdown the program.
|